How to Choose the Right Insulation Board for Your Project?

Choosing the right insulationboard is not simply a matter of selecting the highest R-value. The board must suit the wall assembly, climate, moisture exposure, fire requirements, and installation method. A product that performs well in a dry roof may fail inside a damp basement wall. Small details matter. Joints, fasteners, compression, and edge sealing can change real-world performance.

The International Energy Agency’s Buildings 2023 report states that buildings consume about 30% of global final energy and produce roughly 26% of energy-related emissions. These figures explain why insulation decisions deserve careful attention. The right board can reduce heat loss, improve indoor comfort, and support lower operating costs. However, laboratory ratings do not tell the whole story. Designers should compare thermal conductivity, declared R-value, water absorption, vapor behavior, compressive strength, fire classification, and embodied carbon. Local building codes remain essential.

Dr. Joseph Lstiburek, a leading building-science specialist, described the enclosure principle clearly: “The perfect wall is an assembly that controls rain, air, vapor, and heat.” That idea should guide every insulationboard choice. Start with the building’s exposure, not the product brochure. Check the substrate and expected loads. Confirm that the board will remain effective after years of temperature changes and moisture movement. There is no universally perfect board. That limitation is easy to overlook. A practical selection should balance performance, durability, availability, cost, and installer experience. The following guide examines these factors and highlights where common assumptions need reconsideration.
How to Choose the Right Insulation Board for Your Project?

Define Your Project’s Insulation Requirements

How to Choose the Right Insulation Board for Your Project?

Define Your Project’s Insulation Requirements

Choosing an insulation board starts with the building, not the product label. Start with the building. Identify the wall, roof, floor, or foundation area first. Then assess the local climate, indoor temperature, and required thermal performance. A higher R-value can reduce heat transfer, but thickness and available space also matter. Check the project’s energy targets and local building regulations before selecting a board.

Moisture changes everything. Examine possible rain exposure, ground contact, condensation, and plumbing leaks. Some boards tolerate damp conditions better than others, while certain materials need careful protection during installation. Consider fire performance, sound control, compressive strength, and vapor resistance where relevant. I once focused too heavily on thermal values and overlooked a wet foundation detail. That mistake showed me how quickly moisture can weaken an otherwise suitable insulation plan.

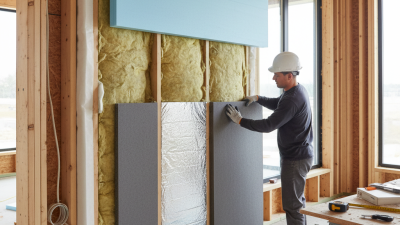
Review the technical data sheet, tested performance, and approved installation method. Confirm whether the board needs mechanical fasteners, compatible adhesives, sealed joints, or a protective facing. Measure twice. Small gaps around corners, windows, and service openings can create noticeable heat loss. Inspect the substrate for dust, uneven surfaces, and movement before installation. If the application is unusual, ask a qualified building professional to verify the design. A practical choice must perform under real site conditions, not only in a laboratory table.

How to Choose the Right Insulation Board for Your Project?

Define Your Project’s Insulation Requirements

Thermal conductivity is a key selection factor: the lower the value, the better the material resists heat transfer at the same thickness. Actual performance varies with density, moisture, temperature, and product design.

Typical thermal conductivity values for commonly used insulation boards. Use project-specific U-value calculations, fire requirements, moisture exposure, structural loads, and local building codes before selecting a board.

Compare Insulation Board Materials and Performance

How to Choose the Right Insulation Board for Your Project?

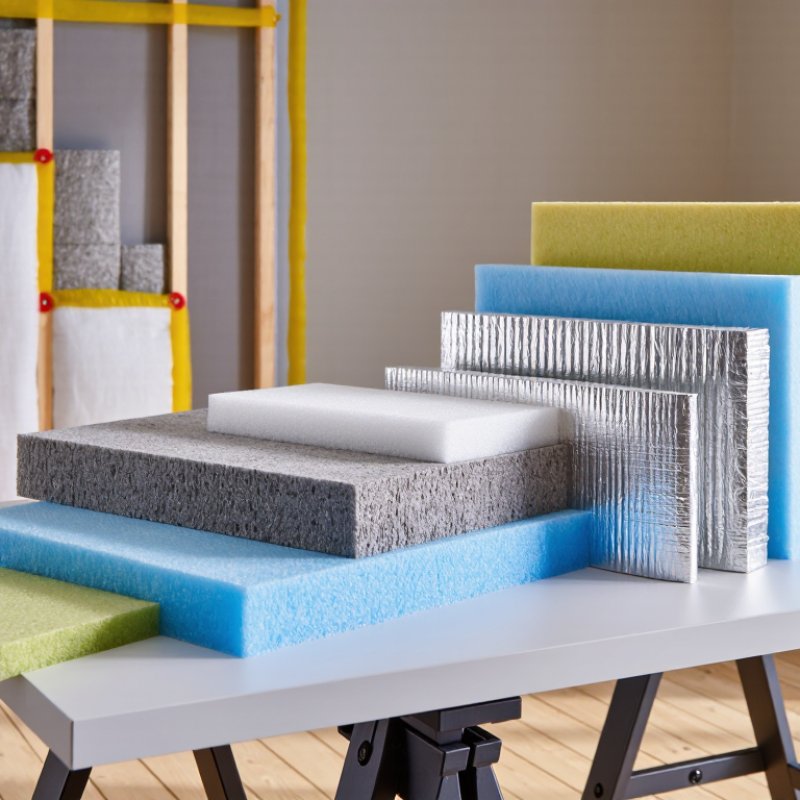
Insulation boards differ in thermal resistance, moisture behavior, fire response, and installation tolerance. The U.S. Department of Energy reports approximate R-values of R-3.6 to R-8.7 per inch for rigid foam boards. Polyisocyanurate usually offers the highest initial R-value. Extruded polystyrene provides stable performance in damp areas. Expanded polystyrene is lighter and often more economical. Mineral wool boards resist heat and can improve fire protection, but they usually need greater thickness.

R-value is not everything. A laboratory number can fall when joints are open, surfaces are wet, or boards are poorly fitted. Measure the wall cavity carefully. Seal every gap around pipes and corners. Small errors matter. The International Energy Agency reports that buildings consume about 30% of global final energy, so reducing heat flow can affect long-term operating costs. For below-grade walls, select boards with suitable compressive strength and moisture resistance. For roofs, check dimensional stability and compatibility with membranes. On a cold morning, a thermal camera may reveal missed joints more clearly than visual inspection.

Product data sheets should state tested thermal resistance, density, water absorption, and fire classification. Standards and local codes still control the final choice. I would not choose the thinnest board automatically. Space, climate, drainage, workmanship, and future repairs deserve equal attention. Performance sometimes fails at the edge.

How to Choose the Right Insulation Board for Your Project? - Compare Insulation Board Materials and Performance

Material Typical Thermal Conductivity
(λ, W/m·K)
Approx. R-Value per 25 mm
(m²·K/W)
Moisture Resistance Fire Performance Typical Compressive Strength Best-Suited Applications Main Advantages Key Limitations
Expanded Polystyrene (EPS) 0.032–0.040 0.63–0.78 Low water absorption compared with many fibrous materials, but exposed edges and joints should be protected. Combustible; requires suitable facings, barriers, and installation details. Typically 70–250 kPa, depending on grade and density. External wall insulation, cavity walls, roofs, floors, and general above-ground applications. Lightweight, economical, easy to cut, and widely available in different densities. Lower fire resistance than mineral-based boards; can be damaged by some solvents and prolonged ultraviolet exposure.
Extruded Polystyrene (XPS) 0.028–0.036 0.69–0.89 Very low water absorption and good resistance to freeze–thaw exposure. Combustible; must be protected from ignition sources and finished according to code requirements. Typically 150–700 kPa, depending on product grade. Foundation walls, below-grade walls, slabs, floors, inverted roofs, and high-load areas. High moisture resistance, good dimensional stability, and strong load-bearing capability. Combustible, usually more expensive than EPS, and has a relatively high environmental impact from manufacture.
Polyisocyanurate (PIR) 0.022–0.028 0.89–1.14 Closed-cell structure provides good resistance to moisture; joints and penetrations still require sealing. Better fire performance than many thermoplastics, but it remains an organic combustible material; performance depends on facings and system design. Typically 100–175 kPa for common rigid boards. Warm roofs, walls, floors, roofs, and projects requiring high thermal performance with limited thickness. Very low thermal conductivity, high insulation value per unit thickness, and lightweight construction. Higher cost, sensitive to installation details, and performance can vary with temperature and aging.
Phenolic Foam 0.018–0.023 1.09–1.39 Generally good moisture resistance when faced and correctly sealed. Often offers strong fire and smoke performance compared with many plastic foams, but exact classification is product-specific. Typically 100–150 kPa for standard rigid boards. Thin wall build-ups, roofs, floors, and areas where maximum thermal resistance is needed in limited space. One of the lowest thermal conductivities among commonly used rigid boards. Brittle compared with some alternatives, can require careful handling, and is typically more expensive.
Mineral Wool Board 0.034–0.041 0.61–0.74 Vapor-permeable and generally resistant to decay; water-repellent treatments may be used, but the board should not remain saturated. Non-combustible for many products and capable of providing strong fire resistance; verify the tested assembly. Typically 40–200 kPa, depending on density and intended use. Fire-rated walls, façades, roofs, acoustic partitions, and applications requiring vapor permeability. Excellent fire resistance, sound absorption, dimensional stability, and vapor permeability. Heavier than foam boards, can absorb water if poorly protected, and requires careful cutting and protective equipment.
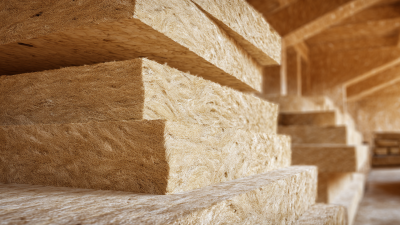
Wood-Fiber Board 0.038–0.050 0.50–0.66 Hygroscopic and vapor-open; requires appropriate weather protection and moisture management. Combustible; fire performance depends on density, treatment, thickness, and the complete wall or roof assembly. Typically 50–250 kPa, depending on board type and density. Breathable wall systems, roof insulation, timber construction, and projects prioritizing bio-based materials. Good heat-storage capacity, useful acoustic performance, vapor openness, and renewable raw material content. Usually thicker for the same thermal resistance, sensitive to persistent moisture, and may cost more than basic foam boards.

Note: The values shown are typical indicative ranges for comparison only. Actual performance depends on product density, thickness, facings, moisture content, temperature, aging, installation quality, and the complete building assembly. Always check the applicable technical datasheet, fire classification, and local building requirements before specification.

Choose the Appropriate Thickness and R-Value

Choosing insulation board thickness starts with the required R-value, not the board’s appearance. R-value measures resistance to heat flow; higher values generally reduce heat transfer. The U.S. Department of Energy recommends attic insulation levels from about R-30 to R-60, depending on climate zone and building conditions. Wall targets differ. ASHRAE 90.1-2022 also sets insulation requirements by climate and assembly type.

Check the product’s declared R-value per inch under the relevant test standard. For example, a board rated R-5 per inch would need roughly four inches to reach R-20. That calculation is useful, but incomplete. Joints, fasteners, framing, moisture, and compression can reduce the assembly’s effective performance. Thermal bridging may become the weak point. A continuous exterior layer often helps limit these losses.

Review the local energy code and the manufacturer’s aged-performance data before ordering. Reports from the U.S. Department of Energy emphasize that climate, air sealing, and installation quality strongly affect real-world energy savings. Do not select thickness by habit. My first estimate was too neat. The site had irregular framing, so the planned board size created gaps. Measure the wall carefully, protect board edges, and seal joints with compatible materials. More thickness is not always better if it causes poor detailing, trapped moisture, or difficult window transitions. Consider the whole assembly, not only the label.

Check Moisture, Fire, and Environmental Considerations

How to Choose the Right Insulation Board for Your Project?

Moisture deserves attention before thermal performance. A damp board can lose insulating value and encourage mold around joints. Check the product’s water absorption, vapor permeability, and drying behavior. Match these properties with the wall location and local climate. Below-grade walls need different protection than interior partitions. I once underestimated drainage details on a renovation project. The board was suitable, but trapped moisture caused avoidable repairs. The assembly matters as much as the material.

Fire performance also requires careful checking. Do not judge safety from a single flame rating. Review tested wall assemblies, surface spread data, smoke behavior, and installation limits. Confirm that the board works with membranes, fasteners, and finishes. Local building requirements should guide the final selection. A product may perform well alone but differently inside a complete wall. That distinction is easy to miss.

Tips: Ask for current technical data. Check third-party test reports. Inspect edges for damage before installation. Choose materials with recycled content when performance remains suitable. Consider manufacturing impacts, transport distance, service life, and disposal options. Environmental claims need evidence, not attractive wording. Compare the whole assembly, not only the board. A slightly cheaper option may create higher repair costs later. When uncertain, ask a qualified designer or building inspector to review the specification.

Plan Installation, Compatibility, and Long-Term Maintenance

How to Choose the Right Insulation Board for Your Project?

Planning begins before the first board is cut. Measure wall lengths, gaps, moisture exposure, and expected heat flow. A basement wall needs different protection from a dry interior partition. Check the board’s thermal rating, thickness, fire performance, and water resistance against local building requirements. Technical data sheets matter more than a quick product label.

Compatibility prevents expensive repairs. Confirm that the board works with your adhesive, membrane, fasteners, and wall finish. Some adhesives can soften certain foam boards. Keep incompatible materials separated by an approved layer. Leave appropriate movement gaps around pipes, corners, and structural joints.

I once focused too heavily on thermal performance and overlooked a damp masonry surface. The installation later required correction. That mistake changed my inspection routine.

Installation quality affects long-term maintenance. Cut boards tightly, but do not crush their edges. Seal penetrations around cables and pipes carefully. Protect exposed insulation from sunlight, impact, pests, and standing water. Record the board type, thickness, installation date, and concealed pipe locations. This makes future repairs less disruptive. Inspect accessible areas after the first wet season, then at regular intervals. Look for loose joints, staining, compression, or damaged sealants. Conditions can change. A solution that works today may need adjustment after renovation, leaks, or altered ventilation.

LSP App

Download the LSP App now

Scan QR code to download the app

We use cookies to personalize content, utilize website traffic analytics & support our marketing initiatives. By continuing to browse our site you consent to receive our cookies. For more information see our Privacy Statement
Ok