How to Choose the Right Pipe Insulation Foam?
Choosing the right pipe insulation foam is not simply a matter of picking the thickest product. The correct choice depends on pipe material, operating temperature, moisture exposure, location, and local installation requirements. A hot-water line in a humid basement faces different risks from a chilled-water pipe in a mechanical room. Condensation may drip onto wiring, while poorly fitted insulation can leave cold bridges around valves and joints.
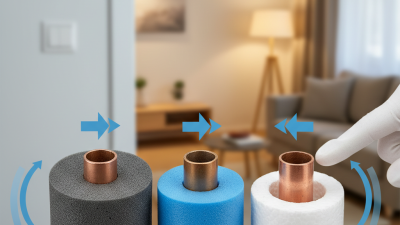
This guide explains how to compare foam types, thicknesses, temperature ratings, and installation methods with practical judgment. Closed-cell elastomeric foam often suits chilled pipes because it resists water vapor. Polyethylene foam can work well for domestic water lines and light-duty protection. Higher-temperature systems may require a product specifically rated for heat, rather than a convenient household option. Read the manufacturer’s data carefully. The label matters.
Real projects are rarely perfect. Pipes may be dusty, uneven, crowded, or already damaged. A technically suitable pipe insulation foam can still perform poorly when seams remain open or fittings are ignored. Measuring the pipe accurately, checking the surrounding temperature, and sealing joints with compatible adhesive can prevent expensive rework. It is also wise to question simple assumptions: thicker insulation does not always solve condensation, and low price does not guarantee long service life. Reliable decisions come from matching verified product data with actual site conditions. That process takes a few extra minutes, but careless selection can remain hidden until energy loss, corrosion, or moisture damage appears.
Define the Purpose and Conditions of Pipe Insulation
How to Choose the Right Pipe Insulation Foam?
Define the Purpose and Conditions of Pipe Insulation
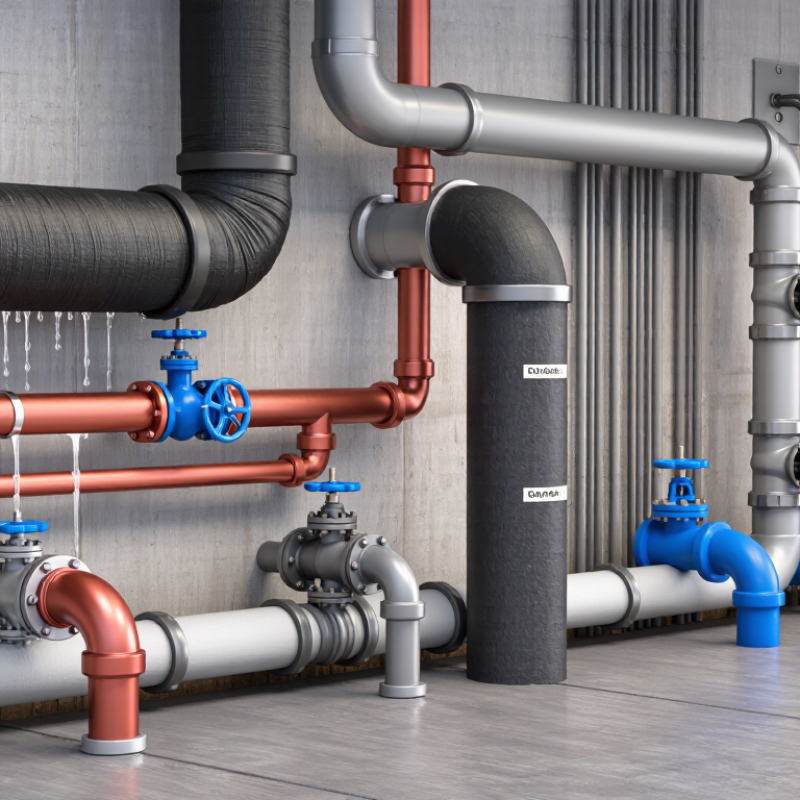
Before choosing pipe insulation foam, define what the insulation must achieve. Cold-water pipes often need condensation control, while hot-water lines need heat retention and contact protection. A pipe running through a humid basement faces different risks from one installed inside a dry service room. Start there.
Measure the pipe diameter, operating temperature, and surrounding temperature. Record humidity, airflow, sunlight, and possible water exposure. For example, a chilled pipe above a ceiling may drip onto electrical equipment if its outer surface becomes too warm. In that case, closed-cell foam with sealed joints may provide better moisture resistance. Thickness also matters; a thin layer may feel adequate but still allow condensation.
Consider movement and maintenance. Pipes expand, contract, and sometimes vibrate when pumps start. Insulation should fit tightly without crushing, and seams should remain sealed after installation. Outdoor sections may require protection from ultraviolet exposure, rain, and physical impact. Check the foam’s temperature range, fire performance, and compatibility with the pipe surface. Local building and fire requirements still apply.
I have seen installations fail because temperature was considered, but humidity was ignored. That mistake is easy to repeat. Recheck the conditions during the worst season, not only on installation day. A practical choice balances thermal performance, moisture control, durability, safety, and future access.
How to Choose the Right Pipe Insulation Foam?
Define the purpose and operating conditions first. The chart compares typical continuous service-temperature ranges for commonly used pipe insulation materials.
Select a material that covers the full pipe temperature range while also considering moisture exposure, UV radiation, fire requirements, mechanical impact, condensation control, and installation location. Values are typical reference ranges; always verify the product specification and local building code.
Compare Common Foam Insulation Materials and Their Properties
Choosing pipe insulation foam starts with comparing material properties, not just price. The 2023 ASHRAE Handbook reports that closed-cell elastomeric foam typically offers thermal conductivity near 0.033–0.040 W/m·K. Polyethylene foam commonly falls around 0.035–0.045 W/m·K. Rigid polyurethane or polyisocyanurate can reach approximately 0.022–0.028 W/m·K, providing stronger insulation with thinner walls.
Thermal performance is only one part of the decision.
Elastomeric foam bends easily around valves and elbows, while polyethylene foam is lightweight and simple to cut. Rigid foam performs well on straight pipe but needs careful joint sealing. The U.S. Department of Energy’s Building America guidance stresses that moisture control and continuous insulation strongly affect real-world efficiency. A small open seam can become a cold, wet line under a chilled-water pipe. It happens more often than installation manuals suggest.
Temperature and fire performance also deserve attention. Check the product’s tested service range and fire classification against project requirements. ASTM C518 test data can compare thermal conductivity, but laboratory values are not field guarantees. I would not select the lowest published lambda value automatically. Compression, aging, sunlight, and poor fitting can reduce its benefit. For hot water, flexible foam may be adequate; for high-temperature systems, rigid mineral-based or specialized foam systems may be safer. Their installation is less forgiving, though.
Match Insulation Thickness to Temperature and Pipe Size
How to Choose the Right Pipe Insulation Foam?
Insulation thickness should follow temperature and pipe size, not habit. A 25 mm foam sleeve may suit a small indoor water line, but it can perform poorly on a larger, hotter pipe. ASTM C680 calculates heat loss and surface temperature using pipe diameter, insulation thickness, conductivity, and ambient conditions. Those variables matter.
For hot-water pipes near 80°C, thicker insulation usually lowers surface temperature and energy loss. The U.S. Department of Energy reports that properly insulated steam and hot-water lines can reduce heat loss by up to 90%. However, this figure is not a universal promise. Moisture, damaged joints, supports, and outdoor wind can reduce real performance. Site conditions change everything.
Cold pipes need a different approach. Thickness must prevent condensation, while a continuous vapor barrier protects the foam from humid air. Larger pipes often need more insulation because their outer surface requires careful temperature control. ASHRAE guidance evaluates insulation through heat-flow and surface-temperature calculations, rather than a single thickness rule.
Measure twice. Then question the first estimate. A practical design might compare 13 mm, 19 mm, and 25 mm options for the same pipe. Check heat loss, surface temperature, clearance, and payback. I have seen thick insulation installed around a valve while nearby straight sections remained exposed. The specification looked correct, but the installation was not.
How to Choose the Right Pipe Insulation Foam? - Match Insulation Thickness to Temperature and Pipe Size
| Typical Fluid or Service |
Approximate Operating Temperature |
Nominal Pipe Size |
Suggested Foam Thickness |
Primary Purpose |
Selection Notes |
| Cold-water, chilled-water, or refrigerant piping |
35–50°F
(2–10°C) |
1/2–1 in
(DN 15–25) |
3/4 in
(19 mm) |
Prevent condensation and reduce heat gain |
Use closed-cell foam with sealed longitudinal and butt joints. A continuous vapor retarder is essential in humid spaces. |
| Cold-water, chilled-water, or refrigerant piping |
35–50°F
(2–10°C) |
1 1/4–2 in
(DN 32–50) |
1 in
(25 mm) |
Control surface condensation on larger pipe |
Increase thickness where indoor humidity is high, air movement is strong, or the pipe runs through warm areas. |
| Cold-water, chilled-water, or refrigerant piping |
35–50°F
(2–10°C) |
2 1/2–4 in
(DN 65–100) |
1 1/2 in
(38 mm) |
Limit condensation and stabilize fluid temperature |
Large pipe surfaces gain heat more quickly; verify thickness with a condensation-control calculation for critical applications. |
| Domestic hot-water supply |
100–140°F
(38–60°C) |
1/2–1 in
(DN 15–25) |
1/2 in
(13 mm) |
Reduce heat loss and protect against surface contact |
Confirm that the selected foam is rated for the maximum operating temperature, not only the normal temperature. |
| Domestic hot-water supply |
100–140°F
(38–60°C) |
1 1/4–2 in
(DN 32–50) |
3/4 in
(19 mm) |
Reduce heat loss on larger distribution lines |
Protect insulation from ultraviolet exposure, impact, and moisture when installed outdoors or in service areas. |
| Low-temperature hydronic heating |
140–180°F
(60–82°C) |
1/2–1 in
(DN 15–25) |
1/2–1 in
(13–25 mm) |
Reduce heat loss between the heat source and terminal units |
Use a foam product specifically approved for the operating temperature. Some polyethylene foams are not suitable for this range. |
| Low-temperature hydronic heating |
140–180°F
(60–82°C) |
1 1/4–2 in
(DN 32–50) |
1 in
(25 mm) |
Improve system efficiency and maintain water temperature |
Keep insulation continuous through supports, valves, and fittings where practical; use compatible fitting covers or fabricated sections. |
| High-temperature hydronic or process piping |
180–220°F
(82–104°C) |
All sizes |
Do not select foam automatically |
Prevent material failure and reduce heat loss |
Many common foam products are limited below this temperature. Consider mineral wool, calcium silicate, or another high-temperature system after checking the product rating. |
| Outdoor piping exposed to weather |
Service-dependent |
All sizes |
Use the service-temperature thickness above |
Control heat transfer while protecting the insulation |
Add a weather-resistant jacket or coating. Foam alone can degrade from ultraviolet radiation, rain, and mechanical damage. |
Important selection rule: The recommended values are practical starting points for closed-cell pipe insulation and are not a substitute for local energy codes, fire regulations, condensation calculations, or the manufacturer’s temperature rating. Select thickness based on the highest expected operating temperature, pipe size, ambient temperature, relative humidity, and installation location.
Check Moisture Resistance, Fire Safety, and Environmental Needs
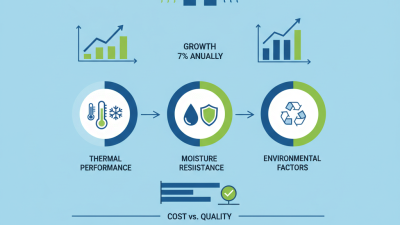
Choosing pipe insulation foam starts with the moisture conditions around the pipe. In a humid plant room, warm air can condense on cold surfaces within minutes. Closed-cell foam usually limits water absorption, but sealed joints matter just as much. Check the product’s water-vapor resistance, thickness, and operating-temperature range. Press the sample. It should feel uniform, not brittle or wet. A careless seam can defeat expensive insulation.
Fire safety requires more than a flame-resistant label. Ask for tested flame-spread and smoke-development data for the exact foam and thickness. Confirm whether the insulation needs a protective jacket, especially near electrical equipment or escape routes. Installation materials, adhesives, and vapor barriers can change the final rating. Follow local building and mechanical codes. If test evidence is vague, pause. That uncomfortable delay is safer than guessing.
Environmental needs deserve the same scrutiny. Compare recycled content, manufacturing emissions, indoor-air emissions, service life, and disposal options. Low-VOC materials may be preferable in occupied buildings, but “green” claims still need measurable evidence. Ask for a technical data sheet and an independent test report. Also check whether the foam can be separated from the pipe during renovation. No option is perfect. On-site inspections often reveal recyclable material wasted through poor cutting and excessive offcuts. Plan the layout carefully, then review the choice after installation.

 Skip to main content