How to Choose the Right Grounding Kits for Your Project?

Choosing the right Grounding Kits begins with understanding the project environment, not simply selecting the lowest-priced package. A grounding system must safely control fault current, reduce touch voltage, and remain stable during harsh weather. The correct choice depends on equipment type, soil conditions, conductor size, and local electrical requirements. It also depends on installation quality.

Small details matter.

A copper grounding conductor may perform well in ordinary soil but deteriorate faster near saltwater or industrial chemicals. Stainless steel, tinned copper, or galvanized components may provide better protection in those locations. Clamps must match the conductor diameter and grounding electrode material. Loose connections can create heat, resistance, and dangerous voltage differences. A kit that looks complete may still lack the correct bonding hardware.

Field conditions deserve careful attention. Measure soil resistivity when the project requires reliable performance. Check whether the site contains buried utilities, reinforced concrete, moisture, or unusual corrosion risks. Follow applicable IEC, IEEE, NEC, or local standards, depending on the project location. Manufacturer instructions also deserve serious review, especially for exothermic connections and inspection points.

No checklist replaces judgment.

A practical selection process includes reviewing drawings, calculating expected fault levels, confirming material compatibility, and planning resistance testing after installation. Some projects need a larger electrode system than the original design suggests. That possibility should not be ignored. Mistakes often appear after heavy rain, equipment upgrades, or years of corrosion. Choosing Grounding Kits carefully helps create a safer, more maintainable electrical installation, although every site still requires qualified engineering review and documented verification.
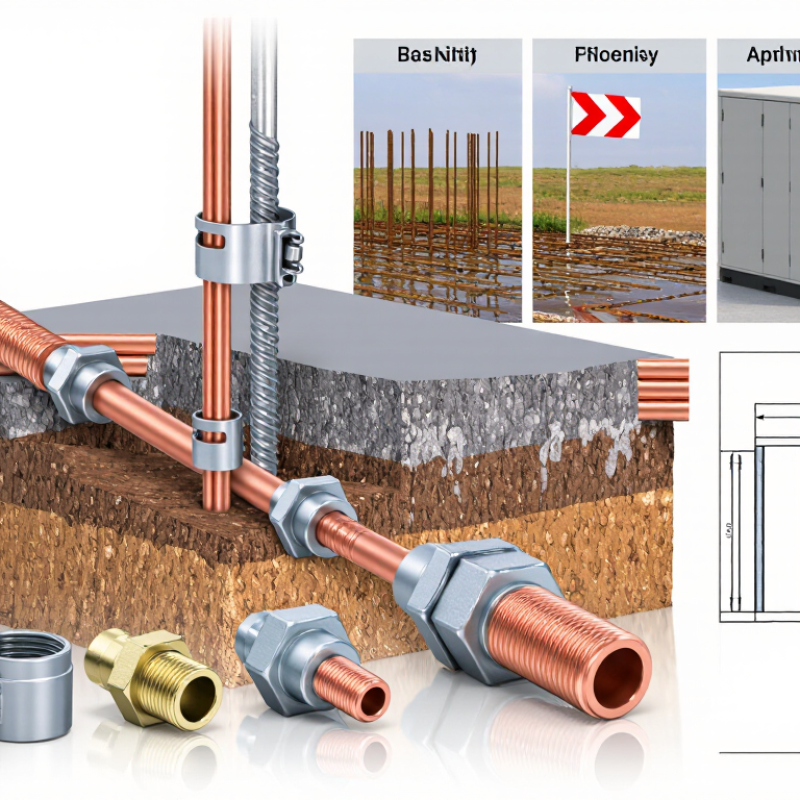
How to Choose the Right Grounding Kits for Your Project?

Define the Grounding Requirements of Your Project

Before choosing a grounding kit, define what the project must protect.

Identify the system voltage, fault current, equipment type, and installation location. A rooftop cabinet faces different risks than buried equipment near a chemical process area. Moisture, vibration, corrosion, and limited working space can change the required design.

Start with the grounding path. Confirm the conductor size, connection method, electrode type, and expected fault-clearing time. Check soil resistivity where grounding electrodes will be installed. High-resistivity soil may require deeper or additional electrodes. The kit must also match the conductor material and connection environment. Dissimilar metals can create corrosion problems. Small details matter.

I have seen projects choose a kit by appearance alone.

That approach failed during inspection because the connector did not suit the conductor diameter. It was an expensive lesson. Ask a qualified electrical engineer to review the fault-current calculation and applicable safety standards.

Verify temperature ratings, mechanical strength, weather resistance, and access for future testing. Keep test records, photographs, and installation measurements. Incomplete documentation weakens an otherwise sound installation.

Field conditions can also differ from drawings, so pause and reassess when soil, clearances, or equipment layouts change.
Match the Kit to the System, Environment, and Materials

How to Choose the Right Grounding Kits for Your Project?

Match the grounding kit to the system, environment, and connected materials. Start with the conductor size, fault-current duty, and connection method. A kit designed for a small control panel may fail in a high-energy installation. Check the required short-circuit rating and installation instructions carefully. The details matter.

Material compatibility also deserves close attention. Copper, aluminum, galvanized steel, and stainless steel can react differently when joined. Use approved connectors, suitable coatings, and correct contact compounds where required. Avoid relying on appearance alone. A bright connection is not always a reliable connection. Confirm that the lug, clamp, and conductor are designed to work together.

The environment often decides the kit’s real service life. Moisture changes everything. Outdoor systems may face rain, salt, ultraviolet exposure, vibration, or temperature swings. Select corrosion-resistant hardware and sealed connections when conditions demand them. In dusty or wet areas, protect the joint from contamination during installation. I have seen projects focus heavily on conductor size while overlooking drainage and mechanical strain. That choice can create trouble later. An experienced electrician or qualified engineer should verify the design against applicable electrical standards. Before energizing the system, inspect torque, bonding continuity, and conductor routing. A careful test can reveal a small installation mistake before it becomes a serious fault.

Check Electrical Ratings, Standards, and Compatibility

Choosing a grounding kit starts with electrical ratings, not appearance. Confirm the system voltage, prospective fault current, and required short-circuit withstand rating. The kit must safely carry fault energy until protective equipment operates. A higher current rating is not automatically suitable. The conductor, connector, and fixing hardware must work as one assembly.

Check the applicable electrical code and product standards for your installation location. Requirements may differ between industrial panels, cable trays, outdoor enclosures, and temporary equipment. Verify test evidence, certification markings, and installation instructions. Do not rely on a familiar label alone. Standards change, and old project notes can mislead.

Compatibility requires close attention to detail. Match the kit with the conductor size, conductor material, enclosure finish, and available mounting space. Copper and aluminum connections may need suitable interface hardware to reduce galvanic corrosion. Inspect hole diameter, bolt length, thread type, and bonding surfaces before ordering. Small details matter.

I have seen installations fail during inspection because paint remained under a bonding point. Remove coatings only where the instructions permit, then protect exposed metal against corrosion. A qualified electrical professional should confirm continuity and torque values after installation. I still recheck these points, because a correct-looking kit can remain electrically unsuitable.

Compare Installation Methods, Durability, and Maintenance Needs

How to Choose the Right Grounding Kits for Your Project?

Grounding kits should match the installation method, conductor size, soil conditions, and expected fault current. Mechanical clamps are quick to install and easy to inspect. They work well where access remains available. However, vibration, moisture, and thermal cycling can reduce contact pressure over time. Compression connectors create a firm connection when installed with the correct die and force. They need careful preparation. Exothermic connections usually provide excellent permanence, especially in buried or high-corrosion locations. Their installation requires trained personnel, dry materials, and controlled procedures.

Durability depends on more than the connector itself. Copper, galvanized steel, and aluminum react differently in wet or salty environments. Direct contact between incompatible metals may accelerate corrosion. Use compatible materials and protective compounds where the design requires them. A buried connection should resist soil movement, water exposure, and repeated fault stress. It should not depend on visual appearance alone.

Maintenance needs also influence the choice. Accessible clamps allow periodic torque checks and visual inspection. Buried connections reduce routine access, so installation quality becomes more important. Inspect above-ground points for rust, loose hardware, damaged conductors, and heat marks. Record test results and connection locations. A low resistance reading is useful, but it does not prove every joint is mechanically sound. It is easy to overvalue one test. Review the complete grounding path, follow applicable electrical requirements, and use qualified personnel for testing and installation.

Evaluate Costs, Suppliers, and Long-Term Project Value

Choosing a grounding kit starts with project risk, not the lowest quotation. In field inspections, I compare conductor size, clamp materials, corrosion resistance, fault-current capacity, and installation access. IEEE Std 80 recommends evaluating ground potential rise, touch voltage, and step voltage for substation designs. A kit that passes a catalog test may still fail after poor soil preparation or loose connections. Measure twice.

Supplier evaluation should include traceable test reports, material certificates, warranty terms, and replacement availability. IEC 62561-1 provides requirements for lightning protection system components, including connection components. Ask suppliers to state the applicable test method and environmental limits. Vague compliance language is a warning sign. It is also worth requesting three-year price estimates for inspections, spare parts, and labor. The cheapest kit may become expensive when corrosion appears behind a sealed enclosure.

Long-term value is easier to defend with outage data. Uptime Institute’s 2024 Annual Outage Analysis reported that more than half of surveyed outages cost over 100,000 dollars, while roughly one-fifth exceeded one million dollars. Grounding is only one factor, but a failed connection can amplify equipment damage, downtime, and investigation costs. Select suppliers that support commissioning measurements, labeled connection points, and digital maintenance records. Keep the test results. They matter later.

A practical review should compare total installed cost, expected service life, inspection frequency, and failure consequences. I would not treat every manufacturer claim as proven evidence. Independent testing and site-specific measurements deserve greater weight.

How to Choose the Right Grounding Kits for Your Project?

Cost, supplier performance, installation effort, and long-term project value comparison

The comparison uses typical project-planning benchmarks for four common grounding approaches. Installed cost includes materials and labor per grounding point, while the long-term value score combines service life, maintenance requirements, corrosion resistance, and lifecycle cost. Actual results vary according to soil resistivity, conductor size, local labor rates, and applicable electrical standards.

LSP App

Download the LSP App now

Scan QR code to download the app

We use cookies to personalize content, utilize website traffic analytics & support our marketing initiatives. By continuing to browse our site you consent to receive our cookies. For more information see our Privacy Statement. 
Ok